NOTE: Read through the pattern first as there are two different ways to begin this project. The first start is for those who do not like to purl, the second start is for those who do not like to sew a seam. Choose one of these start methods, then work on through the pattern.
-------------------------------------------------------
First start (for those who do not like to purl): With US size 2, 16" circular or straight needle, cast on 204 stitches. NOTE: Do not join until after the first 8 rows as this is the border of your hat.
Hat Border: Knit 8 rows back and forth on US size 2 - 16" circular needle or straight needle (do not join). Once these rows are complete, you will see 4 knit ridges plus your cast-on row. Knit remainder of hat in stocking stitch (knit every round after joining on circular needle).
--------------------------------------------------
Alternative start (for those who do not want to sew a seam): With US size 2, 16" circular, cast on 204 stitches. Join being careful not to twist and pm at beginning of round. P1 round, K1 round {repeat until you have 8 rows}.
--------------------------------------------------
Either start continues on from here:
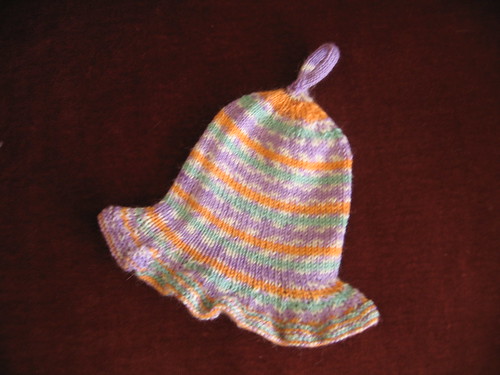
Hat Ruffle:
First row (knit every round for stocking st in the round): If you selected the first start for those who do not like to purl, join in round taking care not to twist, and place marker at beginning of round. If you chose the alternative start, continue knitting in the round. Switch to US size 3 circular needle and knit one round.
Decrease round: Continue knitting in the round and decrease 25 stitches evenly across to marker.
Next round: Knit all stitches around to marker.
Repeat these two rows 3 times more until you have 104 stitches remaining. These four decrease rounds create the "ruffle" part of the hat.
Body of Hat:
Continue to knit every round on 104 stitches until piece measures 4 inches from end of hat boarder (where you started knit every round). Be sure to measure to check length before starting decrease rounds for the crown of the hat.
Switch to US size 3 DPN (or use magic loop method on circular needle) and decrease as follows:
- First round: *K6, K2 together* and repeat around to marker
- Second round (and every alternate round): Knit
- Third round: *K5, K2 tog* and repeat around to marker
- Fifth round: *K4, K2 tog* and repeat around to marker
- Seventh round: *K3, K2 tog* and repeat around to marker
- Ninth round: *K2, K2 tog* and repeat around to marker
- Eleventh round: *K1, K2 tog* and repeat until you have 6 stitches left on your needles.
Knit around on remaining 6 stitches until you have an iCord about 2 1/2 - 3" long (more or less to your taste). Once your iCord is the desired length, knit 2 together around until you have 3 stitches left. Cut yarn leaving a long tail and pull through last loops to close off. Thread the yarn tail through a darning needle, and draw the yarn through the inside of the hat making a loop with the iCord. Turn hat inside out, secure the yarn and weave in end to finish.
If you chose to knit your brim back and forth in knit stitch, sew up the seam on the boarder (not necessary if you chose to knit in the round from beginning).
Copyright 2009 - T. Oreglia (Knitswsticks Designworks)
You may use this pattern for your own personal use but you do not have permission to reprint, distribute or modify to use or sell for commercial distribution (in other words, not for commercial use), or post this pattern as your own.